Learn to make a simple geometric planter that will look great on your desktop or bookshelf. This mini planter uses a simple design, but can be finished in tons of fun, colorful ways.
Part 1: Draw
We'll be drawing this planter in Autodesk Tinkercad. You can make a (free) Tinkercad account here!
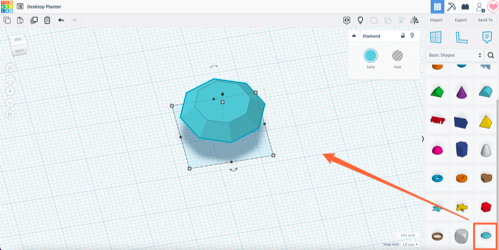
This drawing will be based on the ‘Diamond’ basic shape. To start off, we’ll drag a ‘Diamond’ shape onto the canvas.

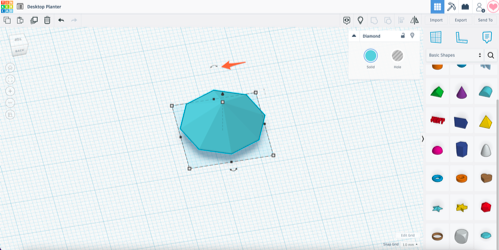
After placing the diamond on the canvas, we’ll flip it so the wide part is on the bottom. That can be done by grabbing the rotation node on top, and rotating it 180 degrees in either direction. Tip: holding ‘Shift’ on your keyboard will allow you to rotate in 45 degree increments.

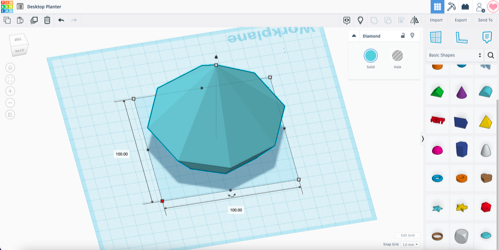
Once your diamond is oriented correctly, you can set its size. The default length and width of the diamond shape is 20 x 20 millimeters, but for our planter we’ll want something bigger! Change the length and width of your diamond to 100 x 100. Its height will be 80 millimeters.
